

The numbers a lord memorizes
12 figures
 0.5–0.7morgen per field
 3 fam + 2 oxper farmhouse ≈ 3–3.5 morgen
 5 apiaries= +10% crop/veg/fruit yield
 1 flour → 4bread at bakery (oven: only 2)
 2–5 fuelbuffer at every production bldg
 6 mo foodstored by October
 1 slab → 1spear (blacksmith, 0.8.065+)
 18 T3 plotsper fully armored regiment (36)
 1,000 / 2,000influence: neutral / enemy region
 ~350influence per bandit group
 Sheep 20gsale price — never dropsBread 5gper loaf, sell it everywhere
Every figure is patch 0.8.097. The Settlement Planner applies them to your own village.
Opening & First Year
15 tips
Works even on the highest difficulty.
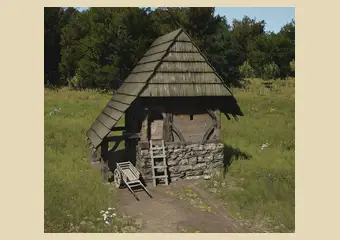
The free builder is what keeps the plot chain moving.

One starting logging camp supplies six. Past that, housing outruns your timber
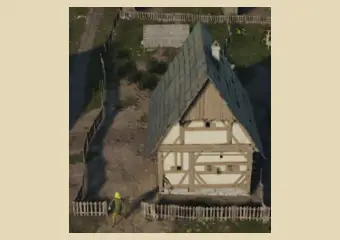
That completes the opening.

Difficulty settings stick; you only re-pick character, map spot and banner
Character-creation screen only. Every new game and reload reuses it after that
Small time cost for a perfect region (rich soil, rich iron…).
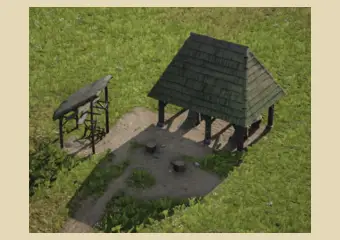
Applies whenever the Baron, bandits, or other AI is active.
Early ore means no imported iron (ratio in #10)

A 100-iron deposit arms 100 spearmen. Ratio corrected for the current flowchart (0.8.065+).
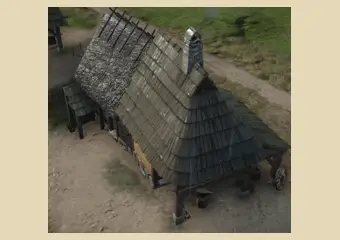
Delaying it delays the whole campaign.

Mine or import extra stone separately if you want to upgrade the granary early; the initial stock is earmarked for those two builds.

Eight is not enough for houses and a logging camp, so the order matters. A storehouse and granary put your starting goods under a roof before the first rain, which damages anything left on the ground.

Fifty per cent is neutral, neither happy nor discontent. You start with five families and no housing, so the clock is already running: build living space early.

New families arrive only when there is surplus accommodation, so housing is what buys you a workforce. Ten plots gives breathing room; below five you stall.
Want the whole opening in sequence? the full build order guide →
Process map — Build order — works on max difficulty- 01Hitching post
- 02
 Order an ox
 - 03
 Logging camp
 - 04
 Granary
 - 05
 Storehouse
 - 06First plot
- 07
 Up to 6 plots
 - 08Firewood

Food & Population
17 tips
This is the ceiling case: two rich deposits worked before winter locks the food supply and population climbs every month instead of plateauing (contrast #13).

Deposits refill in spring. Until then, treasury and trade routes beat chasing families

Most sources shrink then, and the stockpile has to carry you to March
Pelts to sell, but don't plan population growth around it

If the deposit hits max capacity, that year's overflow is lost forever.
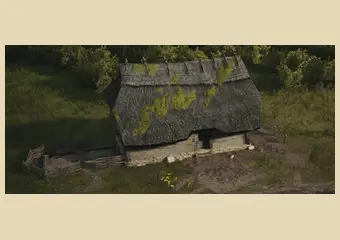
A family on a depleted deposit produces nothing until spring. Reassign them (see #16).

Use these as the baseline when scouting a region: a 'rich' tag on a deposit is worth roughly double a regular one.
Low-tier towns can spam 2 types. Advanced towns need pears AND apples, pigs AND goats, carrots AND cabbage, wheat AND rye bread.
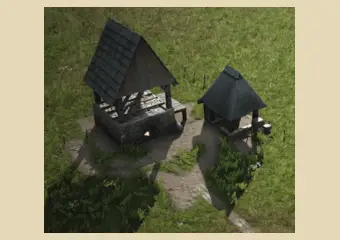
10–12 families harvest 400+ bread. At 5g/loaf that's ~2,000 regional wealth per year if sold.
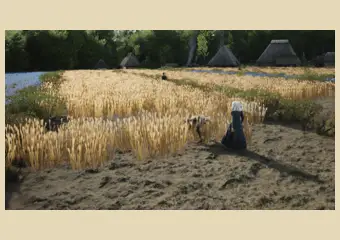
Plots make ~1 meat/month and workers collect one house per trip, no batching. A single central granary either lets meat rot or drops other foods.
100+ fish can vanish in one bad season. Drought hits the standing population, not just your harvest rate.
Treat a drought as a hit to your whole non-grain food chain, not just the fields.

A minimum-stock setting on fishing huts can hold back a reserve so the population recovers, instead of collapsing the way an over-hunted spot does.
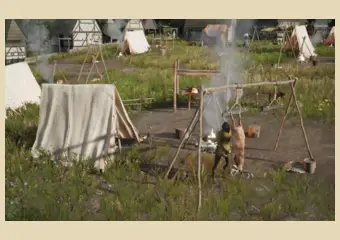
Pushing much below that slows regeneration more than it's worth. 100 balances yield now against recovery speed.
Fish ponds physically freeze over and berry/mushroom gathering pauses in the cold months, which is why those food sources flatline each winter.
Below 50% a whole month can pass with nobody moving in. Above it, one 0.8.100 stream saw two a month land steadily, and crossing 60% pulled a family in mid-month. Streamer observation, not our measurement
A plot finished on the 2nd sits empty for a fortnight
The whole winter problem, in one read: Food & Population guide →
Process map — Food variety, not volume — what gates a plot upgrade- 01Gather / farm
- 02Granary
- 03Market stall
- 042 types = T1
- 054 types = T2
- 06
 More = T3
Logistics & Placement
20 tips
Workers restock out the back door, which saves street frontage for industry
Carts ARE your logistics

Split by type and each cart run stays short

Keeps wool and yarn out of the general storehouse queue, so the tailor never waits behind unrelated goods for a cart.
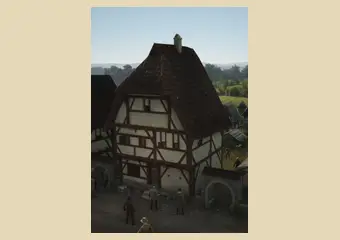
Tiny angles often work where default placement reads red. Stays red? Move a bit, spin again.
Free placement pushes plots edge-to-edge, fitting more inside the same walls
Fiddly, but sneaking one corner sideways can make an extension appear that otherwise won't
Crank it up in an infinite-iron region
Work speed −50%, and plenty of buildings never needed max speed
One of the few buildings that turns rubble stone, otherwise useless, straight into influence. Worth running even where the stone has no other use.

Kills the long trips for trade post workers.
The game auto-assigns the closest family each time, so priority order does the optimizing
Even ~90% keeps up with a full harvest's flour demand, so you don't need a perfect 100. A blocked or awkward site costs far more.
It reveals where every family currently works. Combine it with the reassignment icon to pull spare hands into storage or forestry.
Tearing down something you no longer need, say an empty bloomery once the ore runs out, gives back partial materials and frees its workers immediately.
The cheapest way to collect surface rubble stone before investing in a quarry. Throw one up the moment you spot a deposit.

Repeatedly placing buildings or roads on top of it eventually pushes the animal population to migrate elsewhere on the map.
Treat low collapse odds as a real risk, not a rounding error. Don't stack a second mine's tunnels under or behind an existing one; it raises the chance further.
The footprint wipes it. Check the forage overlay before you place, because a small patch is easy to miss under a build ghost
The crown marker on the deposit is the gate. Without it the quarry option stays unbuildable however much rubble is on the ground
Cost, worker slots and output for every building: Building Atlas →
Wood & Fuel
9 tips
It halves the trees you fell.

Workers then make ONE trip (for charcoal) instead of two. Doubles firewood efficiency. Storehouse conversion works too but eats valuable space.
Regrowing a cut area takes years, so start before you notice the shortage
Cycling the worker off during recovery stops the herd crashing to zero
Hit the cap fast, then that family is free for a year or more.
Not pure loss: felled ground feeds the fields. Balance it against your wood industry
Without one, workers ferry logs there by hand for a long time. A dedicated ox noticeably speeds up plank output.
Setting aside a minimum keeps it fed even when other buildings are drawing from the same timber supply.
Add another family to the charcoal burner rather than cutting more wood.
Work out how much firewood winter needs with the fuel calculator →
 Process map — The charcoal loop — 2x fuel per log
- 01Logging camp
- 02Woodcutter
- 03Charcoal kiln
- 04
 2x fuel

Production & Artisans
11 tips
One malt house with 2 families makes LESS malt than two malt houses with 1 each. Same for bloomery, tile maker, weaver. Build wide, not deep.
Every step between workshop and storage is a round trip lost (see #42)

Next to it, not near it.

Only 2 of 3 family members can craft; the 3rd fetches fuel instead of idling. Far from fuel with no buffer = −50% efficiency or worse.

Slower AND half as efficient. Only use it if you physically can't get a plot to T2 with a bakery. Otherwise you're throwing food away.
Reassigning the same families as the seasons turn keeps them employed year-round instead of idle.
Plan for a second brewery once you're rotating all three beverages. One building isn't enough throughput.
A sidearm costs about 2 iron slabs and sells near the price of mail armor, which costs 4. Roughly twice the iron efficiency. Iron parts sell for barely anything.

Milk never appears as a tradeable good at the trading post; run it through a Cheesemonger first.

Like sausages at the butcher, cheese needs both a strong milk supply and a rich salt deposit. Not every region has both.

Beyond food variety, having enough workers to distribute goods is its own noticeable approval boost.
Resolve any good into buildings and families with the Craftsman's Calculator →

Farming & Fields
25 tips
Fallow fields also work but fell trees and waste logs. Roads look natural and cost less. Toggle the fertility overlay while placing.
People can't work a field an ox is plowing, and sowing waits for 100% plowed, so small parcels let labor and oxen run in parallel. Total yield is identical. Oxen also waste time turning at row ends on an oversized field, and harvesters carry crops to the field's center. Both favour narrow fields.

The bonus applies to every farm, orchard and veggie plot in the region at once, which makes it one of the highest region-wide returns available for the cost.
A handful of apiaries lifts the whole region's food with no micromanagement (#47)
Cuts the commute for the families who lose most time to travel at planting and harvest. See #56 for why harvest commuting costs so much.

3.5–4 possible with a perfect setup (adjacent housing, tight work area, fields beside it). Give 3–3.5 to guarantee full harvest every year.
Unrestricted, everyone drifts to one corner. Too many hands on one field and the others miss harvest. Restricted, they split and finish everything.
Fertility regenerates per crop group: 1 year growing, 2 recovering.
Fewer crop types mean fewer field switches for your farmhands, but you trade that labor savings for lower total yield, since fallow years produce nothing (compare #52).
Even wheat–rye–fallow craters the second crop's yield.
Barley and flax have their own separate fertility, so they mix in freely.

They'll do one job or the other, not both. Storehouse or granary work near home suits them
Plan seasonal staffing per crop instead of assuming a uniform harvest cycle across your fields.

Rough annual output at a well-sized plot: beets ~105, carrots ~125, cabbage ~140. A sensible planting order: beets first for a fast food fix, cabbage for the best long-term yield per labor, carrots last for variety once you're stable.
Quince pays back fastest; apples and pears take longer to bear fruit but produce more once mature.
It takes about 2 years to yield anything. A fast vegetable like beets always wins when you're short right now.
Same trap as wheat and rye (#54): treat oats and barley as competing for the same soil, not independent crops.
The field needs at least one crop planted first; burning sacrifices that season's harvest but gives a bigger, faster boost than multi-year fallow.
Removed. Fallow, rotation and field-burning are your only fertility tools now.

Useful baseline numbers for sizing a field before you scale up.
Forced to sow in spring instead of autumn the first time? The field takes a one-time yield hit. Later years run at full efficiency automatically.
Check it before placing any field, not just once at the start.
Rough community-tested figures (no official numbers exist): sheaves on the ground lose ~10%/month, dropping to ~3% once carried into the farmhouse and ~1-2% once threshed into a granary. Rain adds a random extra spoilage hit on anything left outdoors.
Rough community-tested figures: ~15%/month sitting uncollected, ~10% in a burgage plot, ~8% in a granary, ~7% in an upgraded one. Meat and berries spoil fastest; beets barely spoil at all.
That is the real farming calendar, and it is why a field sown too late is wasted labour rather than a smaller harvest. Plan backwards from November, not forwards from spring.
Rotation, fertility and field size in depth: Farming & Fields guide →
Process map — The farmhouse cluster- 01Farmland
- 02Farmhouse + 2 ox
- 03Threshed grain
- 04Flour
- 05Bread
Sheep & Pastures
9 tips
Breeding does the heavy lifting after the initial import. The year-2 spend is small next to the year-6 flock (see #65).
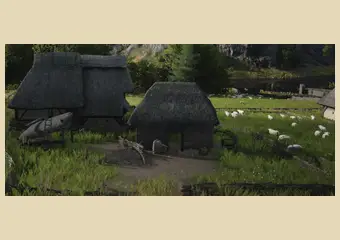
You pay import price for stock that can't produce yet

Wool shortages are rarely a sheep problem. They're a tailor-throughput problem
The mechanics are fiddly pasture geometry, but the practical result holds: subdivide instead of consolidating (see the pasture diagram below). Beta note: one source reports the subdivision advantage was patched out, with capacity now scaling on total area. Treat 3× as pre-patch and re-test it yourself.
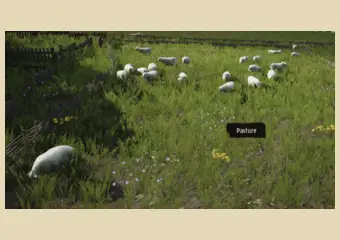
Set limits on the Advanced tab.

Set both on the Advanced tab (see #61). A sheep limit near your true cap stops the game auto-culling breeding stock you'd rather keep.
Leave it high and surplus sheep sit at the cap doing nothing
Animal trading post: uncheck sheep + set import in the region with spares, uncheck + import in the receiving region. Workers cross the border and haul them back.
You still shear, still butcher lambs, still have stock to sell. Possibly the best trade item in the game. Spam it in every region.
Flocks, cows and the new winter feed chain: Sheep & Livestock guide →
Process map — Pasture geometry — same land, bigger flock- 01Pasture
- 02
 Shear in summer
 - 03
 Weaver
 - 04
 Sell or clothe
Burgage Plots & Extensions
18 tips
Extensions lock in a food or goods type for the plot's whole life, so building for today's shortage instead of next year's means redoing the work later.
Large: 200 apples from 2 families beats 200 from 4, and the spare families run their own extensions. Square: minimum walking to the back trees.

Bigger = trees that never get picked = wasted money and space.

Every other month the trees just stand there uncollected. The walking-distance rule from #67 matters more here; there's one shot a year.
Higher-tier plots demand the range even when one food is clearly "most efficient" for your map.
Match the animal to the region and the plot tier you're building toward, instead of defaulting to one meat source everywhere.

Ensure enough males in high-tier plots to qualify for the better armor.
Full chainmail regiment = 18 tier-3 plots (36 helmets + 36 chainmail).

Without Regensburg (#93) the approval hit is more noticeable, but upgrade cost stays low on any origin. Rarely a good reason to leave a plot low once you can afford the jump.
Just 2 planks + 20 regional wealth for roughly 12 eggs + 3 meat (15 food) a year. A built-in surplus over a family's 12-food need, from day one.

A hitching pen plus enclosure runs modest wealth combined, for roughly 7 milk + 5 meat (12 food) a year plus hides. No other cheap source of hides.
Goats, sheep or cattle through a butcher are the only hide sources left, which is why shoes (needing leather) are hard to keep supplied.
Chickens solve early food; goats solve the hide bottleneck. Keep the coops anyway: they add food variety and surplus eggs sell.
No milk, no hides, and less total food than chickens or goats. Unless you're leaning on the forest-mastery bonus below.
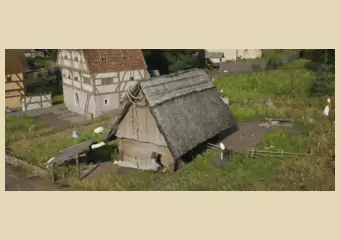
Only pays off once you already have a salt mine and butcher running for other reasons.
Previously capped at +30%. A heavily forested region now pushes pig output noticeably higher, and it keeps climbing with forest %.
Your capital's meadow is worth more under fields, pastures and apiaries. Build a mostly-reforested secondary region for pigs and trade the meat home.
Level 2 is the transformative upgrade: artisans, plus living space for another family. Level 3 adds no capability, only double the regional wealth. An income decision, not a progression one.
How plots, tiers and extensions fit together: The Beginner's Primer →
Process map — The housing ladder — what each level actually buys- 01Plot placed
- 02
 Water + church
 - 032 food types
- 04
 Level 2 = artisan
 - 05+1 family, 1g
- 06
 Level 3 = 2g
Trade & Wealth
13 tips
Trade post gets hopelessly inefficient, and route-opening costs tank your treasury early.
Build stables nearby; assign horses on the livestock tab. A horse carries up to 50 goods a trip, roughly 5× a hand-cart, so 60g pays back fast.
They fund extensions and expensive trade routes early, and stay real revenue late.
They move the needle fastest per unit, but an economy built on a couple of premium goods is exposed to a price or demand shift. Pair them with the steady small trades from #77.

One region sells clay, the other tiles. Keeps you from flooding your own market

Import at 12g, bake it, sell bread at 5g each. Fruits or meats on constant import will bankrupt you.
Not monthly survival goods.
Easy to overlook, because bread is also your food supply. Same math as #20
Observed trading-post values scale roughly 1:2:3 from ore to slab to finished tools. Selling raw ore is barely worth the trip.

Once it's fully staffed and horsed, more horses add nothing. Build a second trading post to keep scaling volume.

Early routes can unlock for well under 50 coin; later ones run several hundred. Budget for it instead of assuming routes are free.
Opening a route costs gold, and spending the starting purse on anything else strands your first exportable good with nowhere to sell it.
Which goods to sell and why routes get expensive: Trade & Wealth guide →
Process map — The export loop — buy low, process, sell high- 01Import cheap raw
- 02Workshop
- 03
 Finished good
 - 04Trading post
- 05Regional wealth
Bartering (Pack Stations)
8 tips
It's powerful (doesn't tie up trade posts), but a food that hits zero = starvation.
None of them feed, clothe or arm anyone, so draining them to zero costs only the goods. The opposite of the food risk in #84.
Trading pears: over-plant pear orchards AND keep apples + quinces as backup so an empty pear stock doesn't crater approval.
Barters clogging your trade post? Build a storehouse closer to the pack route.
Do it at the livestock trading post: export, then lower the limit.
You still bake it, but you won't strip the other region to zero.
Barley-for-pears left one region with rotting fruit while home ran dry; ale-for-barley ran out for months yearly. Until send limits exist, don't build your food economy on it.
Save barter for non-consumables: stone for castles, iron for armories.
When bartering beats a trading post: Trade & Wealth guide →

Origins & Perks
14 tips
High ground kills crops and sheep; two origins exist specifically to counter it.
+1 regional wealth per plot from level 1, scaling: T2 pays 2/family/month, T3 pays 3. Cheap plot upgrades, negligible tax approval hit. (Its salt/iron import perk is worthless; see #100.) Only the base occupied plot counts toward per-plot wealth, not side extensions.
+30% mining, +20% farm yields at altitude, animals import 20% cheaper (incl. plot-extension animals). Cost: −20% artisan speed, rarely the bottleneck.
Also: more from hunting camps (minor), clothing consumption −50% (default: 1 clothing/2mo, 1 shoes/yr). Cost: pricier trade routes, negligible unless you spam routes.
Combined with #99's golden rule, this is close to an auto-skip unless the map's fertility is already so poor that agriculture wasn't going to carry the town anyway.
Less crippling than Volksland since it spares crops, but it still taxes several of the best trade animals in the game (#65, #71).
It slows bakeries, but bakeries run so fast it barely registers.

Run every origin choice through this filter first. See #96 and #97 for the two worst offenders.
Iron @ 1g + 10g tariff, −30% → 11 becomes 10.7… and rounding erases even that. Applies to Regensburg AND Nuremberg Prospectors.
The discount barely survives rounding (#100); the route is what you're picking

Converting a plot to a smallholder farm locks that family onto one extension. For a chicken coop, +20% is a few food a year, nowhere near a family's labor.

Even without converting a plot it gives better food-variety satisfaction and a higher reforestation success chance. A reasonable default if nothing stronger is available.
Route costs otherwise escalate into the hundreds. Taking this early is what makes a trading economy affordable at all, and it is the gateway to the perk below.
Imports are the fastest route to real profit, because you buy a cheap low-tier good and sell the processed version. Cheaper imports widen that margin on every single trade.
Warfare & Militia
19 tips
Stand still, defensive stance, face the charge. Once every bandit reaches the line, flip aggressive.
Hold position and let them come. Losing the charge mid-fight turns an easy bandit clear (#102) costly

A tired regiment loses fights an identical fresh one wins
The manor spawns a retinue that eats a slot. You only need to CREATE the groups, not fill them
Otherwise every group sits half-strength.
Fill the first three fast; pull population from the others without crippling the army.
Rout the frontal push fast, then turn the line to intercept the flankers
Combine both where you can. A castle inside your own territory stacks the morale bonus with the chokepoint and ranged fire from #110.
Also works with bow/crossbow behind any melee front-liner.
Armor tier moves fight outcomes more than troop count does (#73)
If you don't hire them, the AI will, and you can end up facing 10–15 regiments in a single battle.
Signing a contract removes that unit from the shared pool, so grabbing the dangerous ones denies them to the AI even if you don't plan to use them yourself.
The contract fee isn't one-time. Disband a company right after the fight to stop the drain.
Running out of local ore stalls all tool production until a new territory covers it. Line up capacity there first.
Turning up under strength turns a free influence payout into casualties you cannot replace, since every militiaman is a worker who was also doing a job.
Depending on settings, the first level on five plots hands you gear for about 20 spearmen. A whole bandit-clearing force before you build any arms industry.

That single payout covers more than a mercenary company's monthly fee, which means the first camp can fund the clearing of the second without you fielding your own people again.
Shield-bearing units can form a wall for far better defensive stats, and every unit takes a balanced, defensive or aggressive stance. Double-clicking makes a unit run, which empties stamina quickly, so save it for repositioning rather than approach.
They hold instead of shooting, so archers parked behind your line contribute nothing once the lines meet. Angle them for a flank or open ground and they work; place them directly behind spearmen and they idle.
Spears, armour tiers and winning without losses: Militia & Warfare guide →
Process map — Lossless bandit clearing- 01
 Iron ore
 - 02Spears
- 03Militia
- 04Camp cleared
Expansion & Influence
9 tips
Raiders escalate 2 → 3 → 4 per group. Three camps, a couple of early raids, or one late raid = a neutral claim.
When the AI clears camps it gets the money and influence and expands faster. Deny it and you're the one expanding. (Example: Město Litz to wall off the Baron instead of grabbing rich-iron Himmelreich first.)
September = nothing left to collect; the starting stash lasts only a month or two.
Extra bread jump-starts population, extra logs build faster, and you're collecting seasonal food the moment March hits. Adjust the build-order priorities per settlement too.
A resource-perfect spot that raiders can reach easily may not be worth the risk.
There is currently no way to send new settlers. Total loss.
Its citizens' approval doesn't touch your capital, so there's little downside to setting a steep rate right away and draining its treasury into yours.
The old owner often tries to retake it the same season. Keep your retinue or militia stationed there instead of marching home.
Reported in one playthrough: fighting and winning over a region an AI lord was actively claiming took it without spending influence, unlike a normal claim. Worth testing before you bank on it.
Plan the next region claim with the influence calculator →
Traps & Hard Lessons
5 tips
Real example: a manor house build at the top of Devil's Hill, supplied from the town below. Delay long-haul projects to spring/summer.
A whole town was once built around a rich node whose animals had quietly relocated three regions away, making it 100% useless. Give hunting grounds a wider margin than you think you need.
Build extra buffer in a region that's already had one drought. A second back-to-back can drop a settlement to about a month of food.
A defeated garrison doesn't just lose troops. Storage gets drained and buildings torched, setting the economy back for the rest of the campaign.
One case saw 7-10 families starving at once and an extra -11% satisfaction penalty stack on. A bad winter can spiral into an approval crisis that outlasts the food shortage.

New in the Beta (0.8.097)
43 tips
Pasture animals (cows, calves, sheep, lambs) eat Animal Feed every winter month or die. Oats → Animal Feed at the Livestock Farm at a 1:2 ratio.
Passive monthly Milk (except winter), plus Beef and Hides at the butcher. Calves yield half of adults, so let them grow.

Cheesemonger (unlocks at burgage Lv3) turns Milk + Salt into Cheese at 1,1:2. A food type from a renewable source that never depletes.
Oats share fertility with barley but tolerate poor soil far better, and threshed oats can be eaten directly. Ideal for feed regions.
Rye yield was cut 12.5%. Check the fertility overlay: below ~30% wheat fertility, rye still out-yields it.
Pasture fences have a dynamic plank cost scaling with size, and the same pasture space needs about 2.2× the area. Budget planks before expanding herds.
Cows breed in summer, sheep in autumn, offspring arrive in spring. Sheep shear once a year, in summer only. Plan wool contracts around it.
They accumulate yield through spring/summer and harvest in autumn; the Meadow environment (Wilding affinity) sets both yield and how many apiaries the land supports.
Brewery makes Cider from Apples 4:1 and Mead from Honey 1:1. Regions with orchards or apiaries can meet beverage demand without barley.
Production Focus is gone. Artisans start with no active recipe, so set the crafting queue priority manually for every workshop.

Workers pre-stage materials with handcarts and build 50% faster when it's maintained; oxen assigned there haul timber in bulk with the new Ox Cart.
Some structures only complete with builders assigned at the Construction Yard. Unassigned families just haul and flatten ground. Staff it before starting a Large Stone Church.
Buildings can auto-cycle assigned families by season: farms staffed in autumn, kilns in winter, no manual shuffling.
Settlement-level milestones now grant 100 influence (scaling per level) and a Wooden Church grants 100 on build; the Manor now gives 100 (down from 250).
Filter which good types each Trading Post stocks and imports. One post for food, another for military goods.
Fruit fell ~10% too. Backyard veg is no longer a free food engine, so diversify into cheese, fish and bread earlier.
Pig yield now scales with Woodland environment via Pannage. Pigs belong in forest regions, chickens anywhere.
Reforestation is stronger but pricier in labor. The AI now builds two foresters per logging camp; copy it for sustainable wood.
Beta password on Steam: veryNiceBasket (Properties → BETAS → pre_release). Mods will most likely crash it.

Buildings no longer reserve their own products for maintenance. Produced tools can be sold or distributed even if maintenance is due later.
Reselling loses money; adults resell for less than the ~60g import cost. The profit is bred offspring and milk, not flipping bought stock.
Roughly 9/year at baseline, climbing to about 13.5/year around 50% meadow. Still only a modest step up from a goat, which throws in hides.
During breeding season every animal gets a small pregnancy check every 10 days, compounding to about 37%. Offspring per herd caps around 150/year, but hitting that needs a 400+ herd. Treat 150 as aspirational.
Feed converts from oats at 1:2 (#121), so about 3 oats per cow and 1.5 per calf or sheep. Size your oat fields against the target herd before importing.
Reports vary, from the two sharing one enclosure outright to offspring spilling into a neighboring pasture of the other species. Either way, don't assume separate pastures separate the herds.
Oxen now purchase through the livestock trading post like any other animal, with no wait between orders. Bulk-buy several at once.
Citizens and animals route through the entrance and exit points. No more walking straight through the fence.
You used to be able to order animals before the pasture was ready and they'd wait. Gone. With no free space when they arrive they leave and the money's lost. Build the pasture first.
Sickness is a new drag on productivity, which makes the herb garden a direct fix for lost labor time rather than a low-value building.
Expect less wool per shearing than before. Budget a bigger flock, or lean on flax-based linen clothing.

No windmill, communal oven or bakery needed. Harvested oats go straight from threshing to the table, or to animal feed.
The Construction Yard crew (up to 5 families) only handles the advanced structures; regular construction still needs at least one free family to guide the ox cart.
The yard needs them to go up. Get a tier-two joiner producing wooden parts first, not mid-build.

Unlike almost every other building, keep wooden parts stocked or the yard's maintenance will lapse.
Reports vary. Some builds haul timber in bulk as advertised; others still trickle one log at a time despite full staffing. Verify before planning around it.
The build menu's “not enough materials” warning only reads your main storehouse. Goods in the yard's own stock don't count, but the build goes through if the material is there.
Combined with cider (apples) and mead (honey) already covering casual tavern demand, you can run a full beverage economy without ever building a malt house.
Lock a stone-region post to sell only dressed stone and roof tiles, for example, so traders stop wasting trips exporting cheap goods like rubble stone.

The seasonal-work system pulls berry pickers off automatically once their season ends, with no in-game option yet to shift them to another task during the off months.
Use high-meadow regions for honey and crop yields, not for growing a herd faster.

Leaving it unlimited lets the livestock farm turn every harvested oat into feed, leaving your human population with none to eat.
Well above earlier tiers. Line up a dedicated import or production run before starting the upgrade.
Cost scales with the span, so budget lumber heavily for any multi-landmass layout.
Every system reworked in this Beta, one at a time: field guides →

New in 0.8.100
8 tips
A herd you already own now feeds noticeably more families, which makes meat a far stronger answer to the food-variety problem than it was in 0.8.097.

Timber constrains every early build order, so this is the biggest change to the opening. Three oxen move logs roughly three times as fast and the plot chain stops stalling.
If you were relying on cheese to carry food variety through the back half of the year, that supply now stops earlier. Bank it, or plan a second food type for autumn.
Workers only gather from pastures inside it, but still walk outside to fetch oats for feed. Herders finally stop drifting across the whole region.
Yard oxen use the cart and only collect from supply dumps, logging camps or construction yards, though they still deliver to sites. Yard efficiency also shows properly in the maintenance UI now.
Experimental: residents have randomized preferences, so some plots want cider, some ale, some mead. Family members refuse a drink that does not match their distributed type, and will not drink in a tavern with no assigned workers.

A long-standing bug killed oxen parked too close to a pasture. If you lost oxen for no visible reason before this patch, that was almost certainly why.
They now choose the closest available post in the chosen region rather than whichever was built first, respect storage filter rules, and ignore unbuilt posts.

Want the full changelog behind these? the 0.8.100 patch notes →
Nothing in the field book matches. Try a shorter word.